安装Centos7.5.0
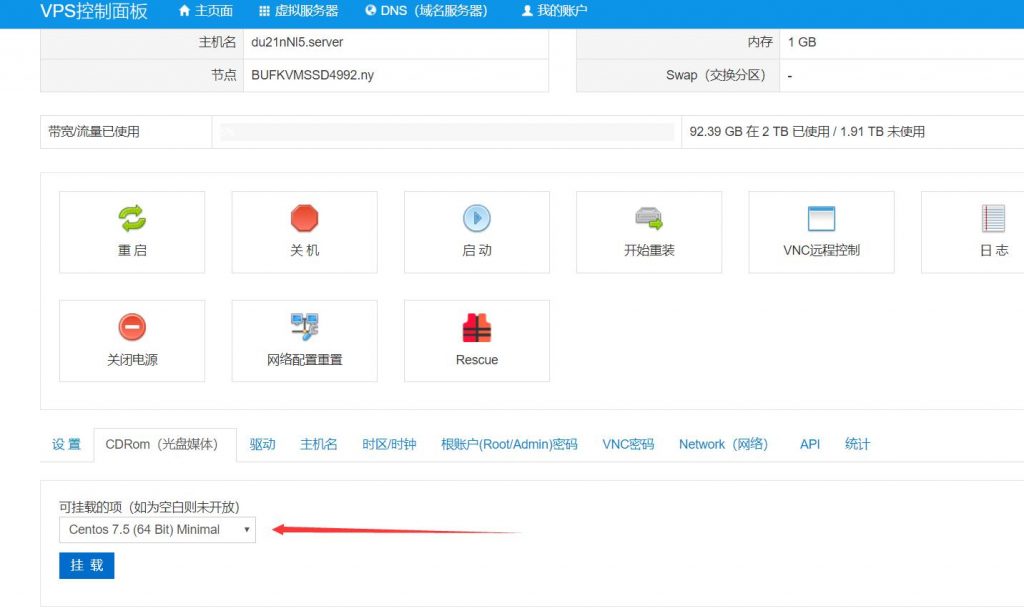
首先打开Himance的后台选择加载CD光盘,如下图:
 在安装的时候遇到一个问题,软件仓库源配置错误,在网上搜索了许久,终于在这个外国网站找到了方法。
CentOS 7.5 NetInstall URL (Installation Source)
| Example mirrors.sonic.net | Alternatively use CentOS own mirror |
|---|---|
| http://mirrors.sonic.net/centos/7/os/x86_64/ | http://mirror.centos.org/centos/7/os/x86_64/ |
| http://mirrors.sonic.net/centos/7.5.1804/os/x86_64/ | http://mirror.centos.org/centos/7.5.1804/os/x86_64/ |
安装BBR
BBR是在秋水逸冰的网站找的一键安装。
使用方法
使用root用户登录,运行以下命令:
wget --no-check-certificate https://github.com/teddysun/across/raw/master/bbr.sh && chmod +x bbr.sh && ./bbr.sh
安装完成后,脚本会提示需要重启 VPS,输入 y 并回车后重启。
重启完成后,进入 VPS,验证一下是否成功安装最新内核并开启 TCP BBR,输入以下命令:
uname -r
查看内核版本,显示为最新版就表示 OK 了
sysctl net.ipv4.tcp_available_congestion_control
返回值一般为:
net.ipv4.tcp_available_congestion_control = bbr cubic reno
或者为:
net.ipv4.tcp_available_congestion_control = reno cubic bbr
sysctl net.ipv4.tcp_congestion_control
返回值一般为:
net.ipv4.tcp_congestion_control = bbr
sysctl net.core.default_qdisc
返回值一般为:
net.core.default_qdisc = fq
lsmod | grep bbr
返回值有 tcp_bbr 模块即说明 bbr 已启动。注意:并不是所有的 VPS 都会有此返回值,若没有也属正常。
安装宝塔面板
这个更简单,直接去官网www.bt.cn看教程安装。之后安装LNMP。
安装Gateone
参照老左博客安装。不过他的一些连接过期了。比如说第二部安装pip,请自行搜索度娘,在pip官网有最新的安装说明,其余步骤继续参考老左博客。因为我VPS要安装nginx,所以把默认的443端口改为4433了,然后写了一段嵌入代码,这样就可以用网页打开了。如本站:http://ssh.hxyxx.xyz。
安装frp
这处是参考http://koolshare.cn/thread-65379-1-1.html安装的,在此感谢原作者 clang。下面将他的文章copy下来。
本处高能:因Frp作者更换新的模块,导致Frp v0.18.0与之前的版本不兼容,如果升级请服务器端同步升级。升级命令:
- wget --no-check-certificate https://raw.githubusercontent.com/clangcn/onekey-install-shell/master/frps/install-frps.sh -O ./install-frps.sh
- bash install-frps.sh update
首先感谢@sadoneli S大的帮助完成了frp插件web页面的制作。仔细阅读完本教程1楼和2楼后再动手安装!
frp 是一个高性能的反向代理应用,可以帮助您轻松地进行内网穿透,对外网提供服务,支持 tcp, http, https 等协议类型,并且 web 服务支持根据域名进行路由转发。
*因为frp是go语言写的,所以在路由器上使用的时候,请使用虚拟内存,请使用虚拟内存,请使用虚拟内存。
脚本是业余爱好,英文属于文盲,写的不好,欢迎您批评指正。
安装平台:CentOS、Debian、Ubuntu。
已测试过的平台:
CentOS 6 32/64bit
CentOS 7 32/64bit
Debian 6 32/64bit
Debian 7 32/64bit
Debian 8 32/64bit
Ubuntu 14 32/64bit
一、安装命令这个命令是在你自己的服务器上运行的!是在你自己的服务器上运行的!是在你自己的服务器上运行的!不是在路由器里运行的!不是在路由器里运行的!不是在路由器里运行的!
- wget --no-check-certificate https://raw.githubusercontent.com/clangcn/onekey-install-shell/master/frps/install-frps.sh -O ./install-frps.sh
- chmod 700 ./install-frps.sh
- ./install-frps.sh install
二、安装步骤
Loading network version for frps, please wait...
frps Latest release file frp_0.8.1_linux_amd64.tar.gz #此步骤会自动获取frp最新版本,自动操作,无需理会
Loading You Server IP, please wait...
You Server IP:12.12.12.12 #自动获取你服务器的IP地址
Please input your server setting:Please input frps bind_port [1-65535](Default Server Port: 5443): #输入frp提供服务的端口,用于服务器端和客户端通信
Please input frps dashboard_port [1-65535](Default dashboard_port: 6443): #输入frp的控制台服务端口,用于查看frp工作状态
Please input frps vhost_http_port [1-65535](Default vhost_http_port: 80): #输入frp进行http穿透的http服务端口
Please input frps vhost_https_port [1-65535](Default vhost_https_port: 443): #输入frp进行https穿透的https服务端口
Please input privilege_token (Default: WEWLRgwRjIJVPx2kuqzkGnvuftPLQniq): #输入frp服务器和客户端通信的密码,默认是随机生成的
Please input frps max_pool_count [1-200](Default max_pool_count: 50): #设置每个代理可以创建的连接池上限,默认50##### Please select log_level #####
1: info
2: warn
3: error
4: debug
#####################################################
Enter your choice (1, 2, 3, 4 or exit. default [1]): #设置日志等级,4个选项,默认是infoPlease input frps log_max_days [1-30]
(Default log_max_days: 3 day): #设置日志保留天数,范围是1到30天,默认保留3天。##### Please select log_file #####
1: enable
2: disable
#####################################################
Enter your choice (1, 2 or exit. default [1]): #设置是否开启日志记录,默认开启,开启后日志等级及保留天数生效,否则等级和保留天数无效
设置完成后检查你的输入,如果没有问题按任意键继续安装
============== Check your input ==============
You Server IP : 12.12.12.12
Bind port : 5443
Dashboard port : 6443
vhost http port : 80
vhost https port: 443
Privilege token : WEWLRgwRjIJVPx2kuqzkGnvuftPLQniq
Max Pool count : 50
Log level : info
Log max days : 3
Log file : enable
==============================================
安装结束后显示:
Congratulations, frps install completed!
==============================================
You Server IP : 12.12.12.12
Bind port : 5443
Dashboard port : 6443
vhost http port : 80
vhost https port: 443
Privilege token : WEWLRgwRjIJVPx2kuqzkGnvuftPLQniq
Max Pool count : 50
Log level : info
Log max days : 3
Log file : enable # 将上面信息添加到你的路由器frp穿透插件中吧
==============================================
frps Dashboard: http://12.12.12.12:6443/ # 这个是frp控制台访问地址
==============================================
三、更新命令
- ./install-frps.sh update
四、卸载命令
- ./install-frps.sh uninstall
五、服务器端管理命令
- /etc/init.d/frps start
- /etc/init.d/frps stop
- /etc/init.d/frps restart
- /etc/init.d/frps status
- /etc/init.d/frps config
- /etc/init.d/frps version
六、更多帮助请移步官方帮助文件
https://github.com/fatedier/frp/blob/master/README_zh.md
安装Ngrok
此处参考Sunny博客。以下为博客原文:
关于ngrok服务器搭建的教程我已经在博客发布了视频教程,我也写了一个ngrok一键安装的脚本放在github上面,需要自己搭建的朋友可以自己去下载。
github地址:https://github.com/sunnyos/ngrok
ngrok
ngrok一键安装脚本,适用于Centos版本服务器
默认安装路径
git:/usr/local/git
go:/usr/local/go
ngrok:/usr/local/ngrok
使用说明:
- chmod +x ngrok.sh
- sh ./ngrok.sh
进行选择,安装
客户端编译好存放的路径:
- /usr/local/ngrok/bin/
需要根据客户端的操作系统环境编译,脚本也已经写好。
我是自己下载下来放进VPS里面安装的。
安装酸酸乳
此处参考秋水逸冰的代码安装。原文copy如下:
本脚本适用环境
系统支持:CentOS 6+,Debian 7+,Ubuntu 12+
内存要求:≥128M
日期 :2018 年 06 月 01 日
关于本脚本
1、一键安装 Shadowsocks-Python, ShadowsocksR, Shadowsocks-Go, Shadowsocks-libev 版(四选一)服务端;
2、各版本的启动脚本及配置文件名不再重合;
3、每次运行可安装一种版本;
4、支持以多次运行来安装多个版本,且各个版本可以共存(注意端口号需设成不同);
5、若已安装多个版本,则卸载时也需多次运行(每次卸载一种);
友情提示:如果你有问题,请先阅读这篇《Shadowsocks Troubleshooting》之后再询问。
默认配置
服务器端口:自己设定(如不设定,默认从 9000-19999 之间随机生成)
密码:自己设定(如不设定,默认为 teddysun.com)
加密方式:自己设定(如不设定,Python 和 libev 版默认为 aes-256-gcm,R 和 Go 版默认为 aes-256-cfb)
协议(protocol):自己设定(如不设定,默认为 origin)(仅限 ShadowsocksR 版)
混淆(obfs):自己设定(如不设定,默认为 plain)(仅限 ShadowsocksR 版)
备注:脚本默认创建单用户配置文件,如需配置多用户,请手动修改相应的配置文件后重启即可。
客户端下载
常规版 Windows 客户端
https://github.com/shadowsocks/shadowsocks-windows/releases
ShadowsocksR 版 Windows 客户端
https://github.com/shadowsocksrr/shadowsocksr-csharp/releases
使用方法
使用root用户登录,运行以下命令:
wget --no-check-certificate -O shadowsocks-all.sh https://raw.githubusercontent.com/teddysun/shadowsocks_install/master/shadowsocks-all.sh
chmod +x shadowsocks-all.sh
./shadowsocks-all.sh 2>&1 | tee shadowsocks-all.log
安装完成后,脚本提示如下
Congratulations, your_shadowsocks_version install completed!
Your Server IP        :your_server_ip
Your Server Port      :your_server_port
Your Password         :your_password
Your Encryption Method:your_encryption_method

Your QR Code: (For Shadowsocks Windows, OSX, Android and iOS clients)
 ss://your_encryption_method:your_password@your_server_ip:your_server_port
Your QR Code has been saved as a PNG file path:
 your_path.png

Welcome to visit:https://teddysun.com/486.html
Enjoy it!
卸载方法
若已安装多个版本,则卸载时也需多次运行(每次卸载一种)
使用root用户登录,运行以下命令:
./shadowsocks-all.sh uninstall
启动脚本
启动脚本后面的参数含义,从左至右依次为:启动,停止,重启,查看状态。
Shadowsocks-Python 版:
/etc/init.d/shadowsocks-python start | stop | restart | status
ShadowsocksR 版:
/etc/init.d/shadowsocks-r start | stop | restart | status
Shadowsocks-Go 版:
/etc/init.d/shadowsocks-go start | stop | restart | status
Shadowsocks-libev 版:
/etc/init.d/shadowsocks-libev start | stop | restart | status
各版本默认配置文件
Shadowsocks-Python 版:
/etc/shadowsocks-python/config.json
ShadowsocksR 版:
/etc/shadowsocks-r/config.json
Shadowsocks-Go 版:
/etc/shadowsocks-go/config.json
Shadowsocks-libev 版:
/etc/shadowsocks-libev/config.json
更新日志
2018 年 06 月 01 日:
1、修正:在启用了插件 simple-obfs 的情况下,libev 版启动失败的问题;
2、修正:在使用 /etc/init.d/shadowsocks-libev restart 命令重启 libev 版服务端时,偶尔出现的 “bind: Address already in use” 问题;
3、修正:移除 libev 版配置文件中的 local_address 字段;
4、修改:不再默认使用 root 用户启动,改为使用 nobody 用户启动 libev 版服务端 ss-server;
5、升级:mbedtls 到版本 2.9.0;
6、修改:libev 版启动脚本中的 -u 参数(即同时启用 TCP 和 UDP 模式),改到配置文件里配置为 “mode”: “tcp_and_udp”;
7、修改:libev 版配置文件的内置 NameServers 为 8.8.8.8,默认是从 /etc/resolv.conf 中取得。
2018 年 02 月 07 日:
1、修改:将默认端口从 8989 改为从 9000-19999 之间随机生成。
2018 年 02 月 06 日:
1、修改:ShadowsocksR 版为 ShadowsocksRR 最新版;
2、新增:ShadowsocksR 版的协议(protocol)增加了 4 个,分别为:
auth_chain_c
auth_chain_d
auth_chain_e
auth_chain_f
2017 年 12 月 29 日:
1、升级:libsodium 到 1.0.16。
2017 年 11 月 25 日:
1、如果 Linux 内核版本大于 3.7.0,则配置文件默认支持 TCP fast open;
2、新增:libev 版启动时支持 verbose mode,也就是默认写 log 到 /var/log/messages 方便查看。
2017 年 11 月 12 日:
1、新增生成 ss:// 或 ssr:// 链接,以及其二维码图片。
※ 脚本会根据当前安装的版本以及输入的各项配置,自动生成 ss:// 或 ssr:// 的链接并在安装成功后显示,直接复制即可被客户端识别。同时生成其二维码图片,并保存在当前目录下,下载后用看图软件打开,也能被客户端识别。
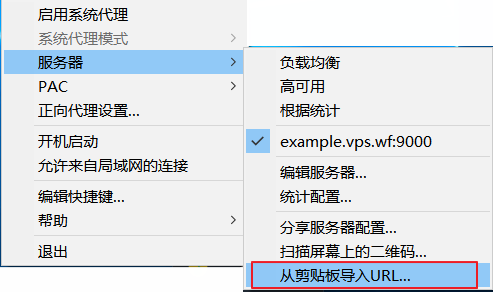
复制二维码链接后 Shadowsocks 客户端识别示例:

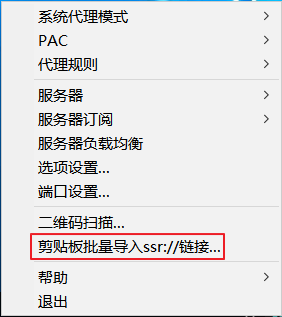
复制二维码链接后 ShadowsocksR 客户端识别示例:

二维码(QR Code)参考链接:
https://github.com/shadowsocks/shadowsocks/wiki/Generate-QR-Code-for-Android-or-iOS-Clients
https://github.com/shadowsocksr-backup/shadowsocks-rss/wiki/SSR-QRcode-scheme
2017 年 10 月 22 日:
1、升级:libsodium 到 1.0.15。
2017 年 10 月 14 日:
1、新增:在安装 Shadowsocks-libev 版时可选安装 simple-obfs 服务端。
※ 脚本通过判断 autoconf 版本是否大于或等于 2.67 来一键安装 simple-obfs 服务端。并且,支持在安装过程中选择 obfs 为 http 或 tls。
※ 使用方法参考:https://teddysun.com/511.html
2017 年 09 月 16 日:
1、修正:Shadowsocks-libev 版 v3.1.0 使用 libc-ares 替换 libudns 依赖包,解决了依赖问题;
2、升级:mbedtls 到版本 2.6.0。
2017 年 07 月 27 日:
1、新增:ShadowsocksR 版可选协议(protocol)auth_chain_b 。使用该协议需更新到最新(4.7.0) ShadowsocksR 版客户端;
2、修改:更新 ShadowsocksR 源码下载地址。
2017 年 07 月 23 日:
1、修正:卸载时可自行选择某个版本卸载,若该版本不存在则报错退出。
2017 年 07 月 22 日:
1、修正:默认加密方式从 aes-256-cfb 改为 aes-256-gcm(Python 和 libev 版);
2、新增:安装时可选 16 种加密方式的其中之一(Python 和 libev 版)。如下所示:
aes-256-gcm
aes-192-gcm
aes-128-gcm
aes-256-ctr
aes-192-ctr
aes-128-ctr
aes-256-cfb
aes-192-cfb
aes-128-cfb
camellia-128-cfb
camellia-192-cfb
camellia-256-cfb
chacha20-ietf-poly1305
chacha20-ietf
chacha20
rc4-md5
3、新增:安装时可选 9 种加密方式的其中之一(Go 版)。如下所示:
aes-256-cfb
aes-192-cfb
aes-128-cfb
aes-256-ctr
aes-192-ctr
aes-128-ctr
chacha20-ietf
chacha20
rc4-md5
4、新增:安装时可选 15 种加密方式的其中之一(none 是不加密,ShadowsocksR 版)。如下所示:
none
aes-256-cfb
aes-192-cfb
aes-128-cfb
aes-256-cfb8
aes-192-cfb8
aes-128-cfb8
aes-256-ctr
aes-192-ctr
aes-128-ctr
chacha20-ietf
chacha20
salsa20
xchacha20
xsalsa20
rc4-md5
5、新增:安装时可选 7 种协议(protocol)的其中之一(仅限 ShadowsocksR 版)。如下所示:
origin
verify_deflate
auth_sha1_v4
auth_sha1_v4_compatible
auth_aes128_md5
auth_aes128_sha1
auth_chain_a
auth_chain_b
6、新增:安装时可选 9 种混淆(obfs)的其中之一(仅限 ShadowsocksR 版)。如下所示:
plain
http_simple
http_simple_compatible
http_post
http_post_compatible
tls1.2_ticket_auth
tls1.2_ticket_auth_compatible
tls1.2_ticket_fastauth
tls1.2_ticket_fastauth_compatible
2017 年 02 月 24 日:
1、恢复: 通过 Github API 自动获取 Shadowsocks-libev 的最新 release 版本的功能(v3.0.3)。
2017 年 02 月 13 日:
1、升级: Shadowsocks-libev 版到版本 3.0.2;
2、升级: Shadowsocks-go 版到版本 1.2.1(基于 Github 最新代码,用 go 1.8 编译完成的 x86 和 x86_64 二进制文件);
3、修复:在 Debian 7 下默认没有 libudns-dev 依赖包的问题。
2017 年 02 月 12 日:
1、升级: Shadowsocks-libev 版到版本 3.0.1。
2017 年 01 月 27 日:
1、升级: Shadowsocks-go 版到版本 1.2.1 (仅适用于 x86_64 系统)
更多单版本 Shadowsocks 服务端一键安装脚本
Shadowsocks Python 版一键安装脚本(CentOS,Debian,Ubuntu)
ShadowsocksR 版一键安装脚本(CentOS,Debian,Ubuntu)
CentOS 下 Shadowsocks-libev 一键安装脚本
Debian 下 Shadowsocks-libev 一键安装脚本
Shadowsocks-go 一键安装脚本(CentOS,Debian,Ubuntu)
注意:以上单版本不可与该四合一版本混用。
配置nginx
因为frp,ngrok等等端口最后都要反代成80及443端口,所以还需要配置SSL,conf等等,这里就不一一描述了,如果需要可单独@我。

Comments 1 条评论
非常的详细,我参考一下试试弄我自己的。 :razz: